@page setup Setting up your Development Environment
You can use any IDE of choice. I recommend using Visual Studio for new developers.
Also make sure you have [.NET 10 SDK](https://dotnet.microsoft.com/en-us/download/dotnet/10.0) installed.
@section visual-studio Visual Studio
This tutorial will go over creating a plugin in Visual Studio.
When installing Visual Studio, make sure you have .NET SDK installed under Individual Components in the Visual Studio Installer.
After installing all the prerequisities, go to create a new Project and select Class Library for C#

After selecting class library and pressing OK, it should prompt what .NET version to use. Be sure to select .NET 10
You can name the project whatever you want.
After all thats done, you should enter the code environment.
First thing you should do is right click your project and add a reference to the compiled FourKit DLL.
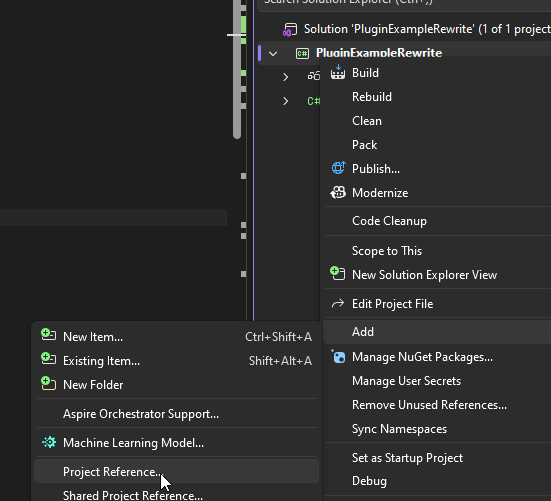
Afterwards a popup should appear. Click Browse and then browse to the DLL and then click OK.
After that you can continue to making a plugin!
@section dotnet Dotnet CLI
If you dont want to install Visual Studio, you can use the dotnet CLI program.
You can create a new dll project by running `dotnet new classlib -n MyAwesomePlugin`
Be sure to add a reference to the FourKit DLL in your csproj file (example for it being in parent dir):
```xml
..\Minecraft.Server.FourKit.dll
```
After this, you can build using `dotnet build`! Your compiled DLL should be in the `bin` folder.
To build as release: `dotnet build -c Release`
Make sure the target framework is set to `net10.0`!
Example full csproj file:
```xml
net10.0
enable
enable
..\Minecraft.Server.FourKit.dll
```
@section compiling Building your plugin
When you build your plugin, it will compile as a DLL.
You place this DLL into the `plugins` folder in your server directory.
You can also even have plugins with dependencies!
Below page will discuss actually making your plugin function, and using dependencies:
@ref plugin-creation